This article will show you how to manually set up your Linksys E9450 WiFi 6 Router as the parent node. This article is for Linksys E9450-AH, Linksys E9450-CN, Linksys E9450-JP, and Linksys E9450-KR.
The preferred method is to use the Setup Wizard; however, if you would rather skip the Setup Wizard, follow the steps below.
Before you begin:
- The default mode of the router out of the box is child mode. The router will not work until you configure it.
- A parent node is the Linksys E9450 that is connected to your modem.
- A child node is another node that will be used to extend your WiFi, like another Linksys E9450.
- You can either use a WiFi-capable device or a computer with an ethernet connection to begin the setup.
- Write down the WiFi network name and password located at the bottom of the router.
Directions
1. Power ON your router and wait for its power and WiFi indicator lights to turn solid blue.
2. Connect to the default WiFi name of your router. The WiFi credentials are located on the product label at the bottom of the router. You can also hardwire a computer to any port labeled 1-4.
3. Launch a web browser, enter “192.168.79.1” in the Address bar, and hit [ENTER]. The default entry for both the username and password fields is admin. You can also enter “linksysxxxxx” (the x's are for the last five characters of the serial number).
4. Click Cancel to exit the Setup Wizard.
5. Then, go to Management > Access Control. Change the default admin password, confirm your entry, and then click Apply/Save.

The required password settings are:
- At least 10 characters in length
- At least one upper-case letter
- At least one lowercase letter
- At least one number
- At least one special character
- Must not use consecutive identical characters
- Values used in the login ID and password shall not be the same.
- Must not use a space at the beginning or end
- Should not contain non-ASCII characters
6. Go to General > Mesh Setup and change the node type to Parent Node then create a WiFi name (SSID) and password (Passphrase). The password is case-sensitive. To save your changes, click Apply/Save then click OK.
If you do not plan to use the EasyMesh™ feature, such as adding additional Linksys E9450 as child nodes, you can set the node type to Non-Mesh System.

7. If you have no other child nodes to add at the moment, click No. Clicking Yes will instruct you to go through the steps of adding a child node.
8. Click Done and connect to your new WiFi name. The WiFi password is case-sensitive.
9. Log back into the router's web interface using the new admin password and then go to Wireless > Radio. Make sure the correct Country is selected where you will be using the router for both the 5 GHz and 2.4 GHz Wireless Interface. Click Apply to save your settings for each radio.
While the router applies the changes for each radio band, you will be temporarily disconnected from your WiFi. Make sure to reconnect to your WiFi before going to the next step.

11. Check if your Internet status light on the router is solid blue. A solid blue light means your router is online and ready to use.
If the router is not online, continue with the steps below:
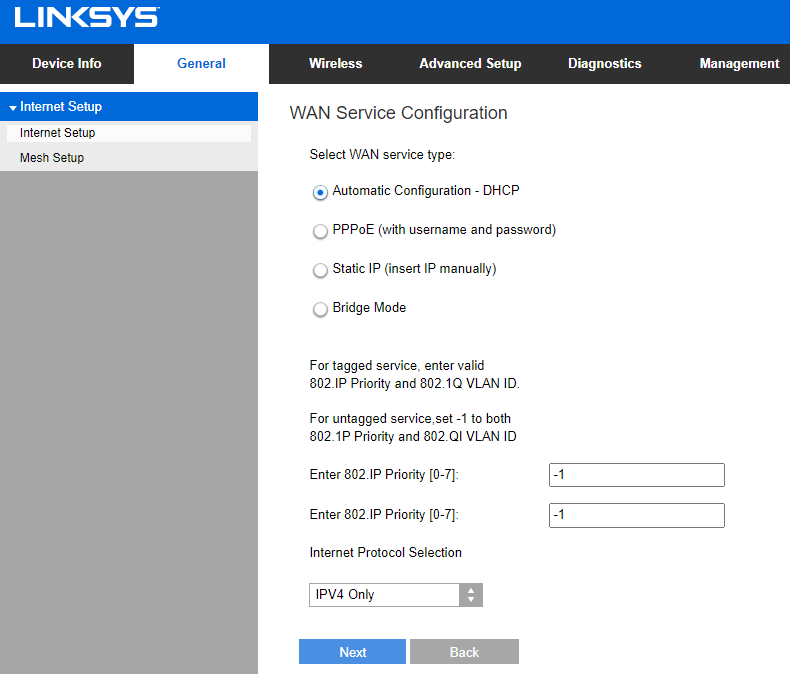
12. Go to General > Internet Setup.

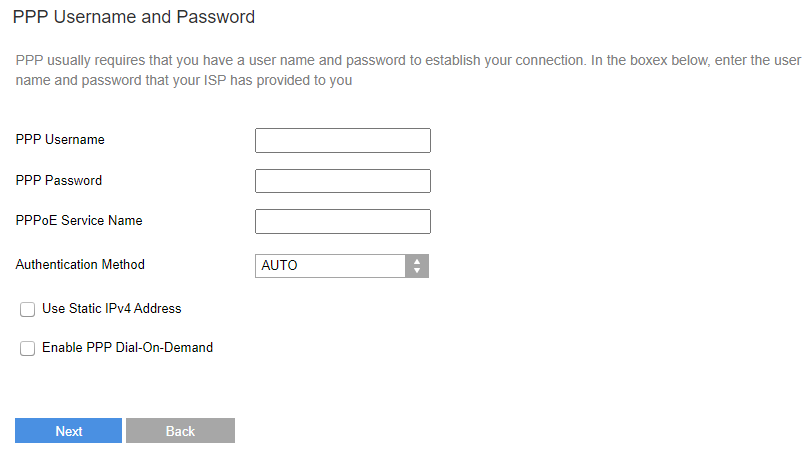
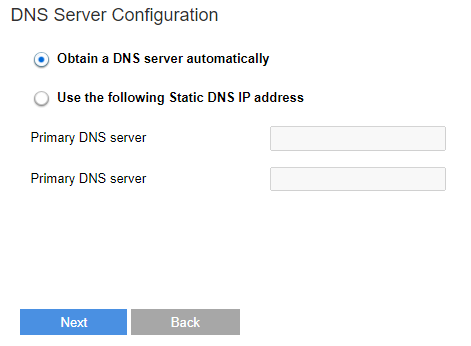
13. Skip to the section on the type of internet connection that you need and follow the steps.

By default, there is an existing DHCP profile. If you need to edit the DHCP profile, you will need to remove it and create it again.
This section works for creating an internet profile for PPPoE, Static WAN IP, and DHCP, or modifying the existing DHCP and Bridge profile.


