The WiFi MAC Filters option of the Linksys app is a security feature that either allows or blocks specific MAC addresses from connecting to your WiFi.
To configure the WiFi MAC Filters feature, follow the steps below.
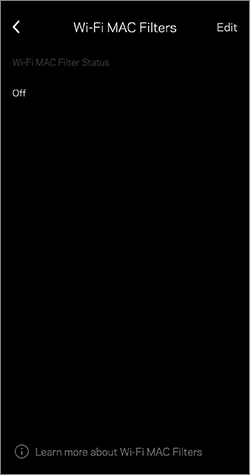
5. Tap Edit at the top-right corner of the screen to change the settings for WiFi MAC Filters.
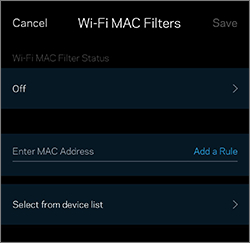
6. Tap on the Wi-Fi MAC Filter Status to change it. By default, this feature is Off.
1. Connect your mobile device to your router's WiFi, then open the Linksys app.
2. Log in to the Linksys app.
3. Tap the menu icon in the upper-left corner.
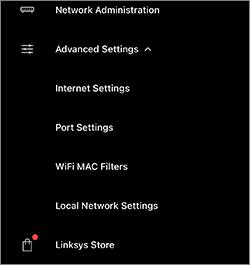
4. Tap Advanced Settings and select WiFi MAC Filters.
2. Log in to the Linksys app.
3. Tap the menu
 icon in the upper-left corner.
4. Tap Advanced Settings and select WiFi MAC Filters.

5. Tap Edit at the top-right corner of the screen to change the settings for WiFi MAC Filters.

6. Tap on the Wi-Fi MAC Filter Status to change it. By default, this feature is Off.
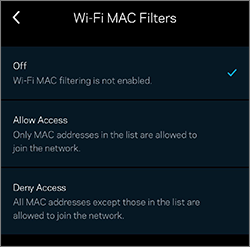
7. Select which WiFi MAC Filter to use.
-
Allow Access – Only MAC addresses in the list can join the network. Enter the MAC address of the wireless device you want to allow access to, then tap Add a Rule. Alternatively, you may tap on the Select from device list option. Make sure to tap Save at the top-right corner of the screen.
-
Deny Access – All MAC addresses except those in the list can join the network. Enter the MAC address of the device you want to deny access to, then tap Add a Rule. Alternatively, you may tap on the Select from device list option. Make sure to tap Save at the top-right corner of the screen.
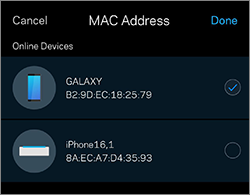
8. From the list, tap on the device you want to Allow or Deny Access to and then tap Done.
9. Tap Save, and then tap Yes.


