In the Advanced Settings tile, you can find common configuration settings including Internet, Local Network, and Port Forwarding settings.
Note that some settings are not supported in Bridge mode. In this example, the parent node is in router mode, which is the default setting.
To access this section, follow these steps:
1. Log in to the web interface.
2. Go to Menu, and then click on Advanced Settings.

3. Choose from the following settings to configure:
Settings may vary by model.

Internet Settings
Local Network
Advanced Routing
Administration
To change the Internet Settings, follow these steps:
1. Go to Internet Settings. By default, you will be taken to the IPv4 tab. If you need to configure IPv6 settings, switch to the IPv6 tab, make your changes, and click Save.

2. In the Internet Connection Type tile, click the pen icon, choose a connection type, enter any required settings, and click Save. Automatic Configuration - DHCP is the default setting.

MAC address clone
To access this feature, follow these steps:
1. Go to Internet Settings.
2. Click the pen icon to edit your connection type.

3. Enable the MAC Address Clone tile, then either enter the MAC address in xx:xx:xx:xx:xx:xx or click Clone current client’s MAC and click Save.

Release & Renew
Click the Release & Renew tab to release and renew the Internet IP address.


In this section, you can change your Host Name, LAN IP address, DHCP server, and DNS settings.
Host Name
To change the Host Name of the router, enter a name and click Save.

LAN IP Address
To change the LAN IP address, follow these steps:
1. Go to the LAN IP Address tab.
2. Enter your new IP settings.

3. Click on the DHCP Server tab. If you see the ![]() icon, adjust the starting IP address.
icon, adjust the starting IP address.

4. Click Save.

5. Once your settings have been saved, reconnect to the WiFi and click Redirect.

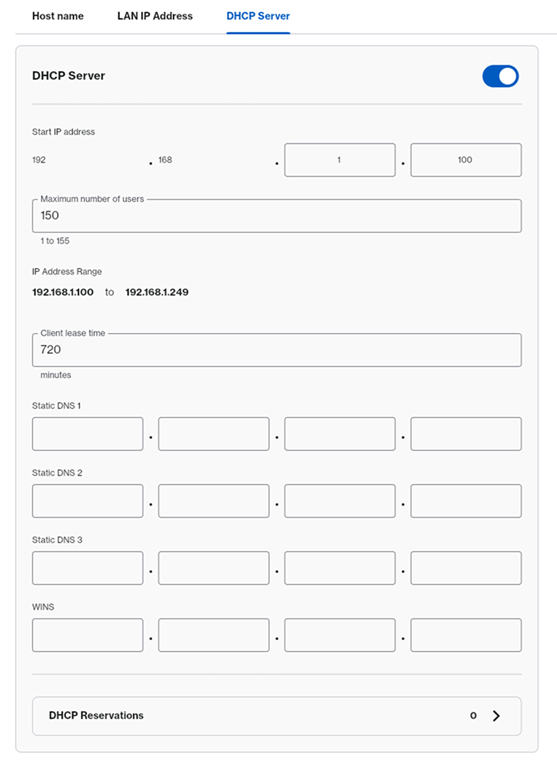
DHCP Server
In the DHCP server tab, you can configure your DHCP Server, DNS settings, and DHCP Reservations.
DHCP Reservations
To reserve an IP address for a device, click to select from a list or enter the setting manually. Follow these steps to learn more:
Before you begin:
- Write down the MAC address of the device that you want to reserve an IP address for.
- If your device is using the random MAC address feature, where it changes the MAC address, you might want to change this option on your Android® or iOS device.
1. Click on DHCP Reservations.
2. Check the box of the device you want to reserve.
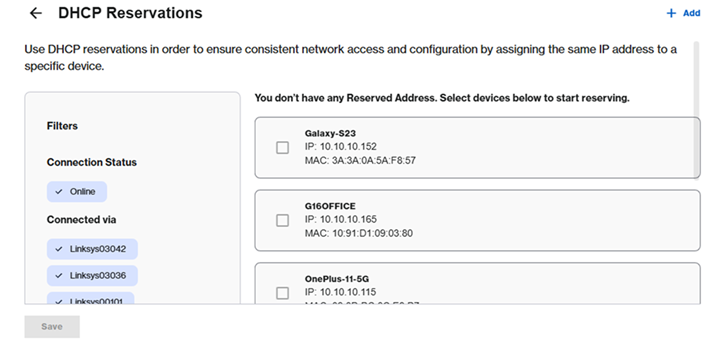
3. Click Save.

4. To customize the IP, just click the edit icon, enter the new IP, and click Update.

To manually add a client, click on ![]() , enter the device name, customize the IP, and enter the MAC address in xx:xx:xx:xx:xx:xx, and click on Save.
, enter the device name, customize the IP, and enter the MAC address in xx:xx:xx:xx:xx:xx, and click on Save.

In this section, you can configure dynamic or static routing. The default setting is NAT.

To add a static route, click on the ![]() . Enter your settings and click Save.
. Enter your settings and click Save.

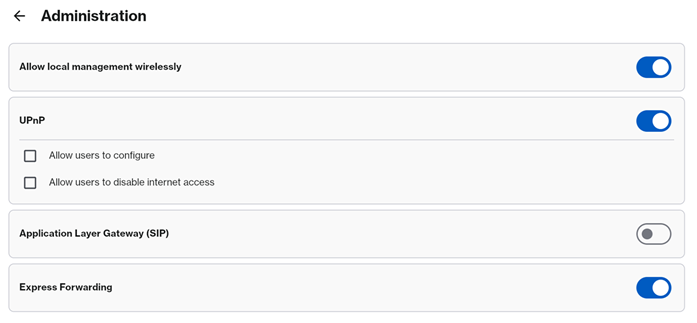
In the Administration section, you can configure the UPnP settings and enable/disable SIP or Express Forwarding.
In the Firewall section, you can configure the following advanced settings.


To configure DMZ, simply turn it ON and enter your settings. Make sure to click Save.


Under this section, you can configure the following settings:
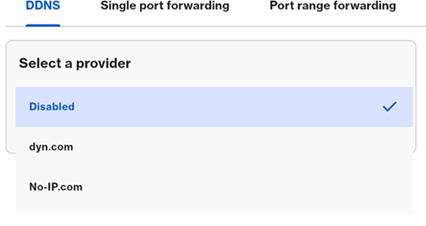
DDNS

Here are the following options for DDNS.
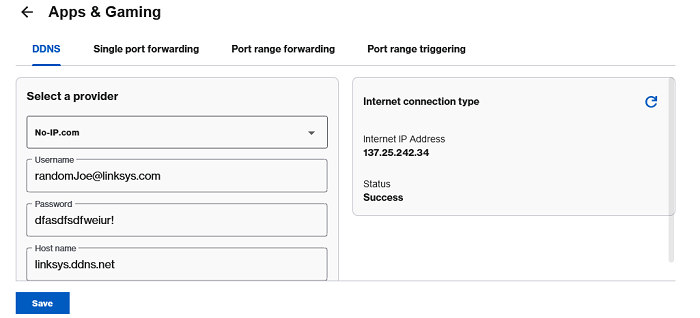
Note that you can refresh the page if the status still shows as Connecting. Make sure to click Save.
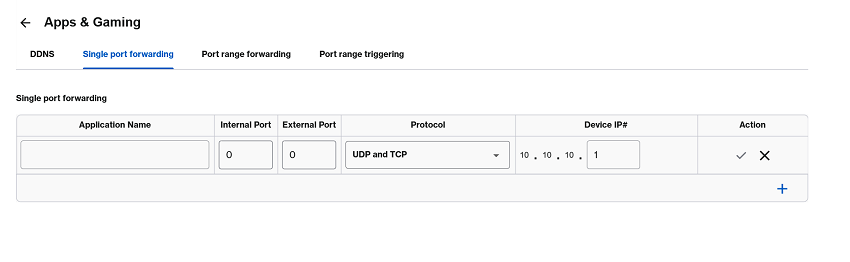
Single Port Forwarding
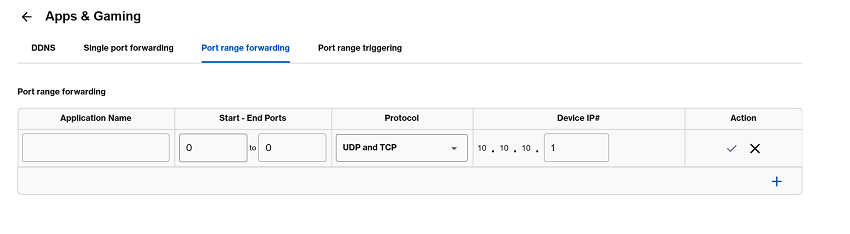
Port Range Forwarding
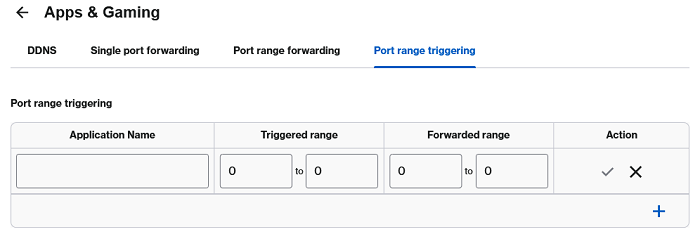
Port Range Triggering